Confidence Begins With a Beautiful Smile
So, you are ready to get that dream smile in our orthodontic office. Congratulations! The benefits of correcting misaligned teeth are so many! Straight teeth are pleasing to look at and greatly boost confidence and self-esteem. More importantly, properly aligned teeth enhance the biting, chewing, and speaking functions of the jaw.
We are all unique individuals with different bites, tooth shapes and sizes, and goals. So, each and every orthodontic treatment plan that we recommend for our lovely patients is well planned and unique. Check out the 4 Steps below:
Check out the 4 Steps below:
Step 1: The Consultation and Planning Stage
A comprehensive exam allows us to leave no orthodontic problem uncovered. This will include:
Panoramic X-ray
Also known as a panorex or panoramic radiograph, is a special type of X-ray that captures a wide, 180-degree view of the entire mouth, including the teeth, upper and lower jaws, and surrounding structures. Unlike traditional X-rays that focus on one area at a time, a panoramic X-ray provides a comprehensive image of the whole oral and jaw region in a single shot.
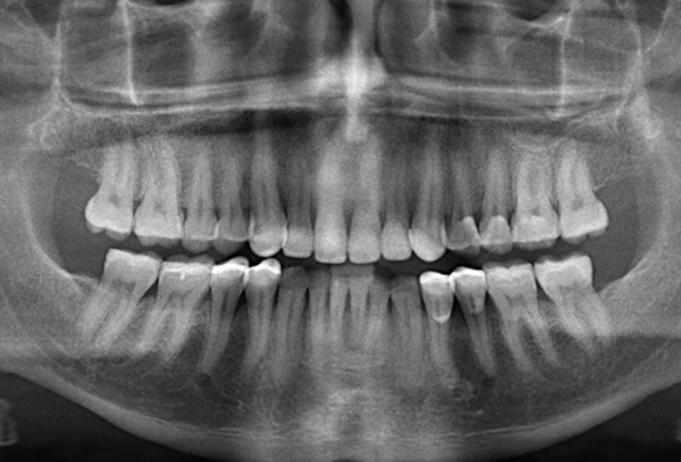
A panoramic X-ray is non-invasive and usually takes just a few minutes. The patient stands in a machine while a rotating arm moves around their head. The patient must remain still and bite gently on a small rest, which helps ensure a clear image.
Panoramic X-rays are considered very safe. The radiation used in dental X-rays is minimal, especially compared to the natural background radiation we are exposed to daily. However, as with any X-ray, it is important to limit unnecessary exposure. We will only recommend this X-ray when it’s necessary for diagnosis or treatment planning.
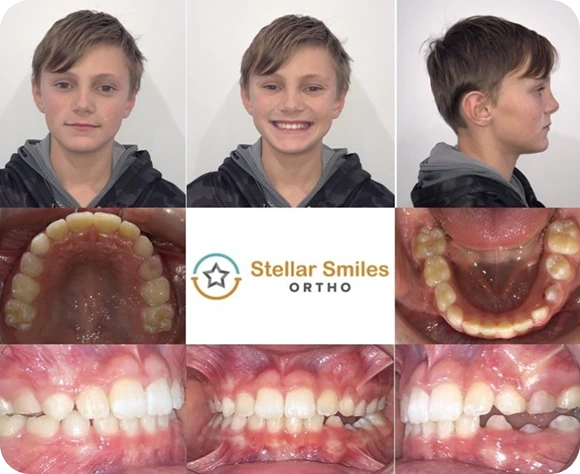
Orthodontic Diagnostic Pictures
Also known as Orthodontic Diagnostic Intraoral and Extraoral pictures, are a series of photographs taken by our office to help assess and document the condition of a patient’s teeth, bite, and facial features. They are a crucial part of the diagnostic process in orthodontics and also allows us to compare and evaluate progress made.
Types of Orthodontic Diagnostic Pictures:
1. Extraoral Photographs These are taken of the face and profile to examine the overall alignment and balance of the facial structure. The following types are common:
Frontal View:
A photograph of the face taken from the front to assess the symmetry of the facial features, including the alignment of the teeth and jaws.
Why it’s important: Helps evaluate facial asymmetry, how the teeth line up with the face, and any visible skeletal issues.
Profile View:
A side view of the face to analyze the relationship between the upper and lower jaws, as well as the positioning of the teeth.
Why it’s important: This photo is crucial for assessing issues like an overbite, underbite, or protruding teeth, and provides insight into how the jaws are aligned.
Smile View:
A close-up shot of the patient smiling.
Why it’s important: Allows the orthodontist to assess how the teeth look when smiling and check for any issues like teeth showing too much or too little.
2. Intraoral Photographs These pictures are taken inside the mouth to show the condition of the teeth and gums. The patient typically bites down into a specific position to allow the orthodontist to take clear photos.
Frontal View:
A photo taken from inside the mouth that shows both the upper and lower teeth together.
Why it’s important: It helps assess how the teeth fit together (the bite), alignment issues, and the spacing between teeth.
Right and Left Bite Views:
Photos taken from the sides of the mouth with the teeth in a biting position. These images show how the teeth align when the patient bites down.
Why it’s important: They help assess side-to-side bite issues, such as overbites, underbites, or crossbites.
Occlusal View:
A photo taken from directly above or below the teeth, showing the bite as the patient opens their mouth.
Why it’s important: This view provides insight into the overall bite and alignment, allowing the orthodontist to check for crowding, bite discrepancies, or other issues.
Lateral Cephalometric X-ray
A lateral cephalometric X-ray (often referred to as a lateral ceph X-ray) is a specialized type of X-ray commonly used in orthodontics to evaluate the bones and soft tissues of the head, including the teeth, jaw, and facial structures. It provides a side-view image of the skull, helping the orthodontist assess various aspects of your facial and dental alignment.
What Does a Lateral Cephalometric X-ray Show? This X-ray captures the following key areas: Teeth Alignment, Jaw Position and Relationship, Facial Growth and Development, Airway Evaluation, Bone Structure and Soft Tissue.
Why is a lateral cephalometric X-ray an essential tool? Diagnosis and Treatment Planning, Facial Aesthetics, Monitoring Growth, Evaluation of Treatment Progress and Surgical Planning.
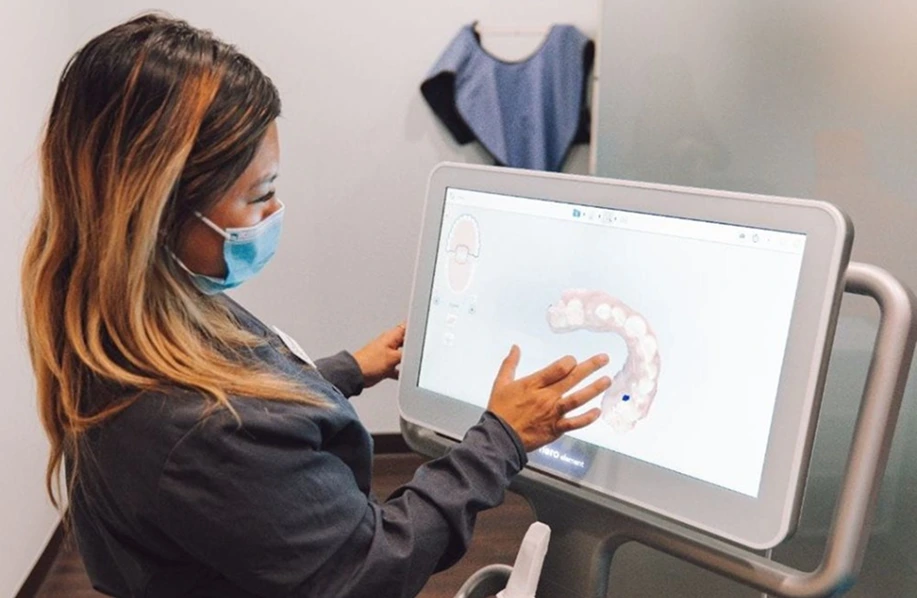
iTero Scan
iTero 3D scan is a cutting-edge digital scanning technology used in orthodontics to create a detailed, accurate 3D model of a patient’s teeth and gums. The iTero scanner is commonly used to help orthodontists plan and monitor treatments, including for braces or clear aligners (like Invisalign®). It’s an alternative to traditional impressions that typically involve biting into a gooey mold material, which everyone finds uncomfortable. At Stellar Smiles Ortho we bring cutting edge technology to your smile.
How Does the iTero 3D Scan Work? The iTero scanner uses a small handheld device that’s gently moved over the surfaces of your teeth and gums. As it moves, the scanner uses light and lasers to capture thousands of data points to create a 3D digital impression of your mouth. The iTero scanner allows us to view your scan in real-time on a screen, providing immediate feedback. This allows us to assess the state of your teeth and gums and make adjustments if necessary during the scan.
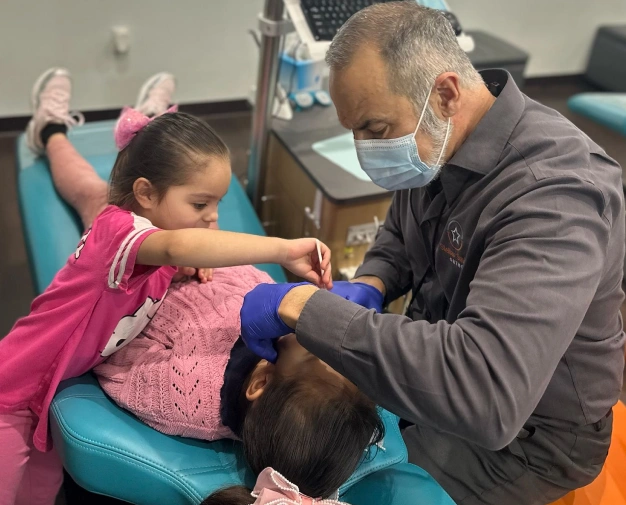
The Clinical Exam
The Clinical exam during an orthodontic consultation is a key part of the evaluation process, where the orthodontist carefully examines your mouth, teeth, bite, and jaw to identify any potential issues and to plan solutions. Our Doctor will carefully review all the diagnostic records that we mentioned above to make sure we don’t miss anything.
Medical and Dental Evaluations – Dental and physical problems tend to go hand in hand. Problems in the oral cavity (mouth) can lead to (or be caused by) medical problems. The goal of this evaluation is to ensure that prior medical and dental issues are completely under control before treatment begins.
Treatment Plan
This is an in-depth discussion and evaluation providing you treatment options to get that beautiful smile that will be healthy, functional, and aesthetically pleasing. We will review your options and how to best achieve them in a convenient and effective way. We will discuss the time it will take to correct your smile, the methods and alternatives we can use and matching your expectations and goals.
Step 2: Getting Started
Traditional Fixed Braces for Teens and adults: We will begin with placing the braces with special orthodontic glue on your teeth. The Doctor will decide if we start with the top or bottom teeth first. We never recommend getting all the braces on all your teeth in one visit. Your body and mouth will get used to the braces a lot faster and eating will be a lot easier if you only get them on the top or bottom at first. We will then schedule you to come back to get the remaining braces in 2-3 weeks.
Traditional Orthodontic Appliances:
Since all appliances are custom made we have to do the “fitting first”. Let’s take a look at the different appliances:
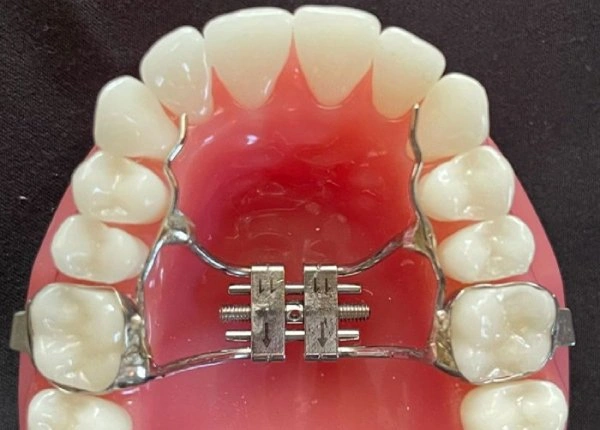
Metal expanders
(needs orthodontic separators)
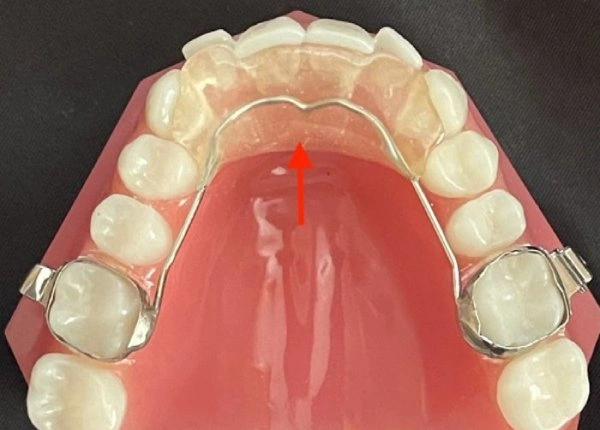
Bite Plate
(needs orthodontic separators)

Nance Holding Arch
(needs orthodontic separators)
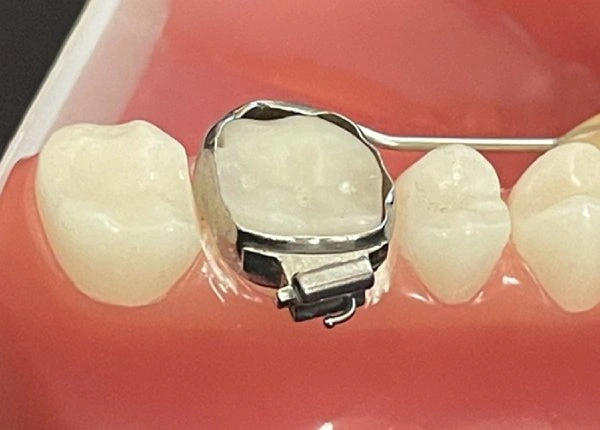
Metal Bands
(needs orthodontic separators)
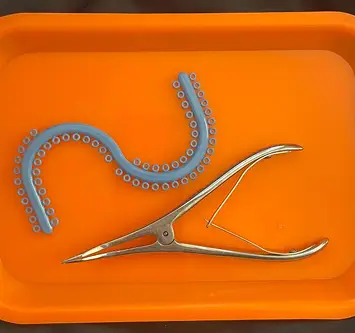
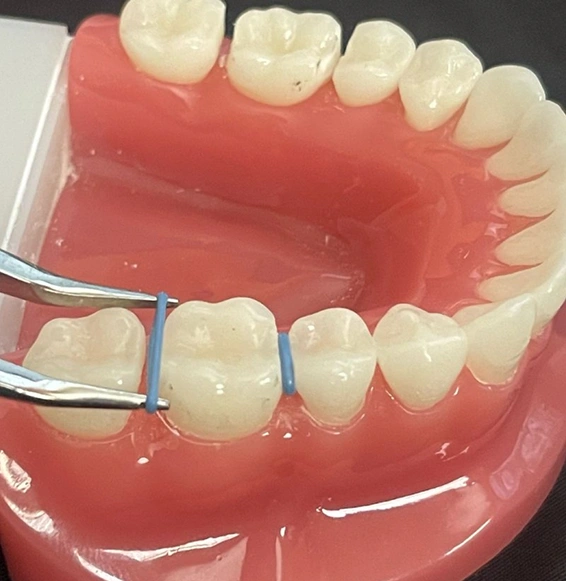
Orthodontic separators, also known as spacers, are small blue rubber bands used in orthodontics to create space between the teeth, usually before the placement of metal rings. They help prepare the teeth by gently separating them to make room for the bands that will be placed on the back molars. They will stay in for 2-3 weeks. You will have to stay away from chewy and sticky things so they don’t pop out. If they fall out naturally that means you have enough space and you don’t have to call us about that – just come to your scheduled appointment for the “fitting”.
Fitting Appointment:
After 2-3 weeks, the separators have made enough space so we are able to do the fitting of the metal rings on your back teeth. This will allow us to know exactly how the appliance will fit. If we have a good fit then the next step will be to do an iTero 3D scan.
iTero 3D scan is a cutting-edge digital scanning technology used in orthodontics to create a detailed, accurate 3D model of a patient’s teeth and gums with the custom-fitted metal rings. We can then move to the next step of ordering your custom appliance after we print your 3D models.
Delivery Appointment:
After 3 weeks, when we receive the appliance from the Lab, the appliance is glued to the back teeth with a special orthodontic adhesive. We then use a special blue light to cure (harden) the bonding material. This step usually takes just a few minutes. This is followed by detailed instructions on how to take care of your appliance, how to adapt your eating habits, how to activate the appliance and what to do in case of an emergency.
Habit Orthodontic Appliances:
These are small devices designed to help address and eliminate undesirable oral habits, such as thumb sucking, tongue thrusting, or other similar behaviors that can interfere with proper teeth alignment and oral development. These appliances are often used in children to break habits that could lead to long-term dental issues if left unchecked.
The Tongue Tamer is typically placed in the first visit on the back of the top and bottom front teeth where it can gently discourage the child from placing their thumb or tongue in the mouth inappropriately. When the child attempts to suck their thumb or push their tongue forward against the roof of the mouth, the appliance causes mild discomfort or resistance, making the habit less pleasurable or effective.
Invisalign® First for Kids
After reviewing the personalized treatment plan for your child, we will help you download the Invisalign® app. This will greatly help you to motivate to reach your smile goals and keep you on track. You can also watch and share with your friends the Invisalign® smile simulation video.
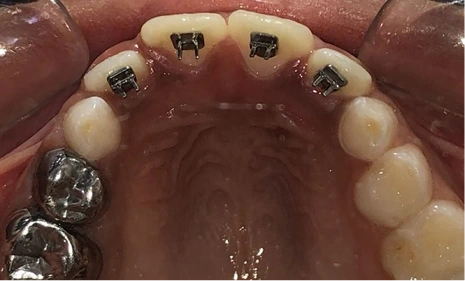
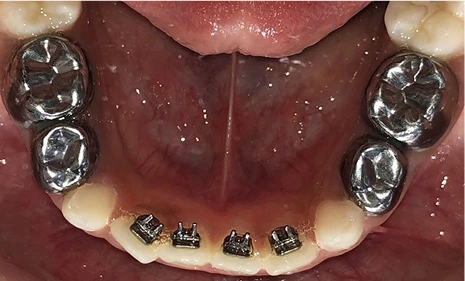
Placement of Attachments
Attachments are small, enamel-colored components that are strategically placed on teeth to help the aligners exert more effective pressure during tooth movement. Here’s how the process of bonding (gluing) typically works:
- Placement: We will place a small amount of dental bonding material on the selected teeth where attachments are needed.
- Light Curing: A special UV light will be used to cure (harden) the bonding material, ensuring the attachments stay securely in place throughout the treatment.
Care Instructions:
We will review with your child and you all the wear and care instructions and what to do in case of an emergency.
Invisalign® for Teens and Adults
After reviewing the personalized treatment plan for you, we will help you download the Invisalign® app. This will greatly help you to motivate to reach your smile goals and keep you on track.
You can also watch and share with your friends the Invisalign® smile simulation video.
Checking the Fit:
The orthodontist will check the fit and comfort of the aligners before proceeding with the attachment placement. Adjustments might be made to ensure the aligners fit correctly.
Placement of Attachments (3-6 weeks later)
Attachments are small, enamel-colored components that are strategically placed on teeth to help the aligners exert more effective pressure during tooth movement. Here’s how the process of bonding (gluing) typically works:
- Placement: We will place a small amount of dental bonding material on the selected teeth where attachments are needed.
- Light Curing: A special UV light will be used to cure (harden) the bonding material, ensuring the attachments stay securely in place throughout the treatment.
Care Instructions:
We will review with you all the wear and care instructions and what to do in case of an emergency.
Step 3: The Active Treatment Phase
Compliance in orthodontic treatment is absolutely crucial for the success of the treatment plan and achieving the desired results. Whether a patient is undergoing treatment with traditional braces, Invisalign®, or any other orthodontic appliance, following the orthodontist’s instructions carefully is vital for effective and timely progress. Non-compliance can cause delays in treatment and result in unsatisfactory results, meaning the teeth may not move into their ideal positions or even extending the time of treatment resulting in more costs. Consider the beautiful end result smile you will achieve and stay motivated!
Step 4: The Retention Phase
When the teeth have been correctly aligned, fixed braces, Invisalign® attachments and fixed appliances will be removed and your teeth polished. The most cumbersome part of the orthodontic treatment is now over. The orthodontist will next create a custom retainer using our state-of-the-art 3D printing. The goal of the retainer is to ensure that the teeth do not shift back to their original positions. Retainers need to be worn for a specified amount of time per day for a specified time period. The Doctor will review your retainer wear schedule in detail with you. During the retention phase, the bone, gums and fibers will reform around the realigned teeth to fully stabilize them in the correct alignment. A smile is for life – keep it that way by always wearing your retainer.
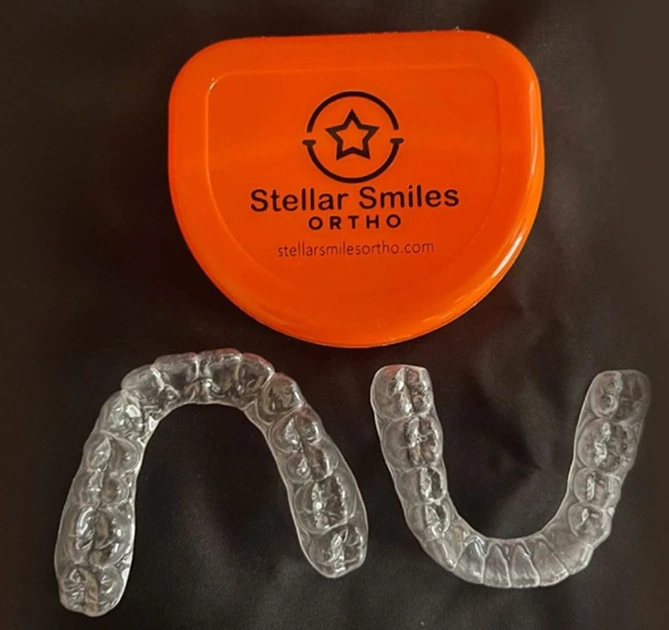
Clear Retainer (Essix Retainer)
Clear retainers, also known as Essix retainers, are made from a thin, clear, plastic material that fits snugly over the teeth.
Material: Made from a clear, durable plastic that is molded to the shape of the patient’s teeth.
Benefits:
- Aesthetic: Clear retainers are discreet and nearly invisible, making them a popular choiceamong patients.
- Comfort: They fit snugly over the teeth, and many patients find them comfortable to wear.
- Easy to Wear: They don’t have wires, so there’s no irritation to the gums or inside of themouth.
Considerations:
- Durability: Clear retainers can become worn down over time and may need to be replaced especially if you grind your teeth a lot.
- Cleaning: They require regular cleaning to prevent buildup of bacteria or plaque. Patients also need to avoid eating with them on to prevent damage or staining.

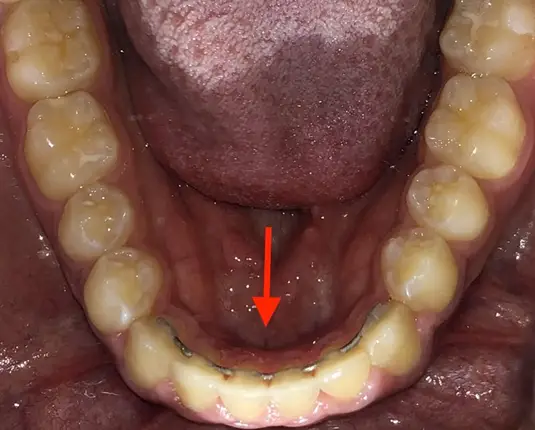
Fixed Retainers (Bonded Retainers)
These retainers are permanently bonded to the back of the teeth, usually the lower or upper front teeth, to keep them in place. They are often used for patients who have had significant orthodontic work and need to maintain their alignment for an extended period.
Material: Typically made of a thin, durable alloy wire that is bonded (glued) to the teeth with special orthodontic glue.
Benefits:
- Permanent: Once attached, fixed retainers stay in place without needing to be removed.
- Convenience: No need to worry about taking them in and out, which makes them a good option for patients who may forget to wear removable retainers.
- Effective for Minor Shifts: Especially useful for maintaining the alignment of the lowerfront teeth or the upper teeth that are more prone to shifting or that had big gaps before.
Considerations:
- Oral Hygiene: Fixed retainers require diligent cleaning around the wire to prevent plaque buildup and avoid gum problems.
- Breakage: Patients have to be careful to avoid biting into hard, sticky, chewie foods with their front teeth as this will break off the glue.
Don’t Wait!
See our orthodontist early and get a free evaluation. The longer you wait, the harder and more painful it will be to fix.